

Este DIY es muy rápido, fácil y barato. Si encima os gusta, pues mejor que mejor! Se trata de hacer tarjetas navideñas con materiales muy baratos y no demasiado tiempo (depende de cuántas tarjetas queráis hacer ;) ). Sólo se necesita lo siguiente:
- Tarjetas en el color que queráis o cartulinas dobladas por la mitad.. Es importante que sean un poquito consistentes.
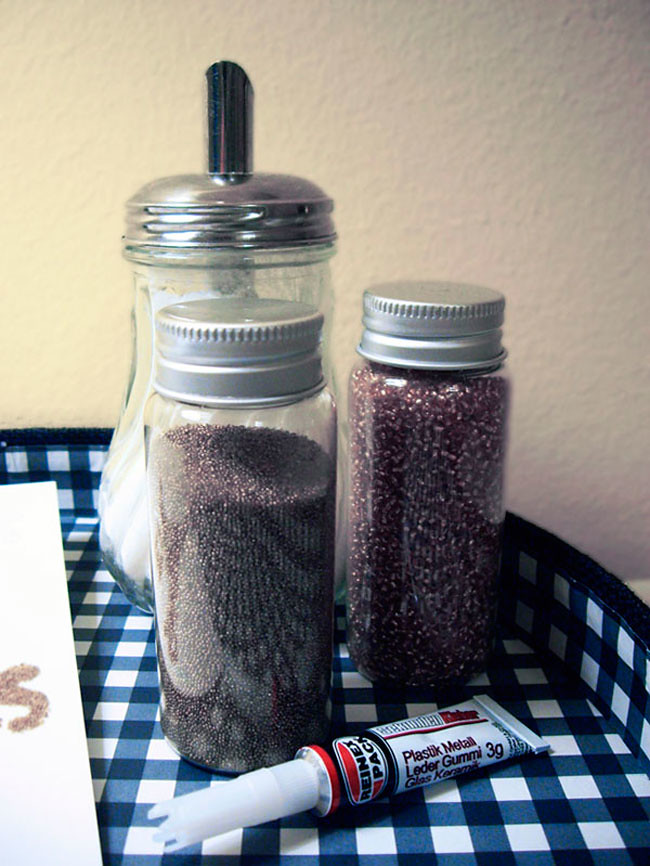
- Pegamento rápido. Imprescindible que tenga una boquilla pequeña, que podáis controlar la cantidad que sale más o menos (el mío lo compré en un chino vamos...)
- Bolitas pequeñas de colores / cuentas pequeñas para pulseras / azúcar / ....
- Una bandeja sobre la que trabajar
This is a very fast, easy and chip DIY. If you think it's nice, then even better! It's about making Christmas cards with very cheap materials and not too much time (depends on how many cards you want to make ;) ). You just need this:
- Cards in any colour you wish or cardboards. They should be quite thick, strong.
- "Fast speed glue". It must have a shape that lets you control how much glue you are putting in each moment more or less (mine is from the 1 euro shop anyway..)
- Little plastic balls / little beads / sugar / ...
- A tray to work on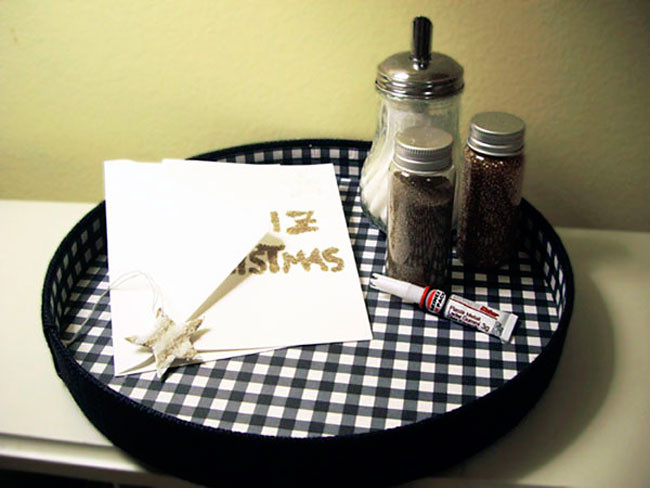
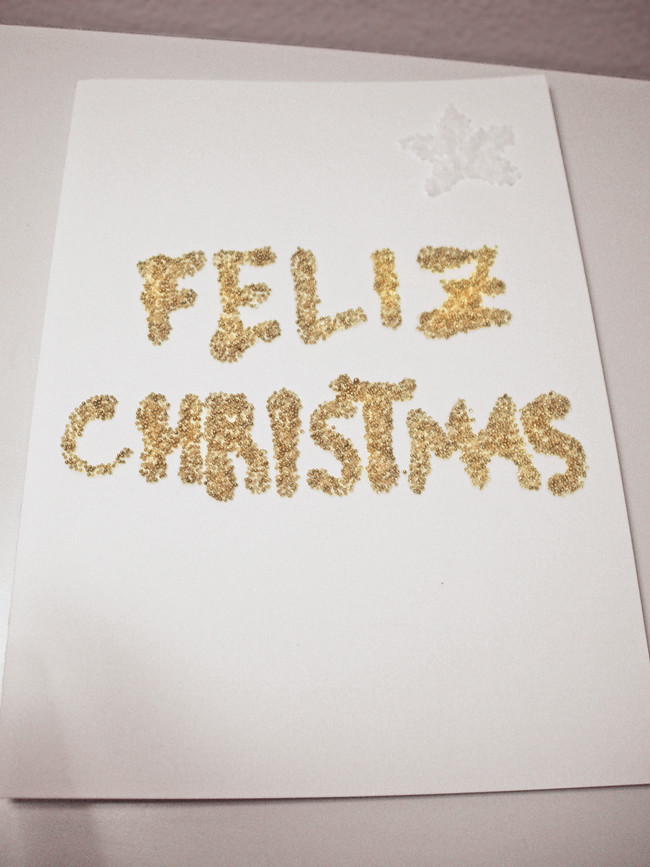
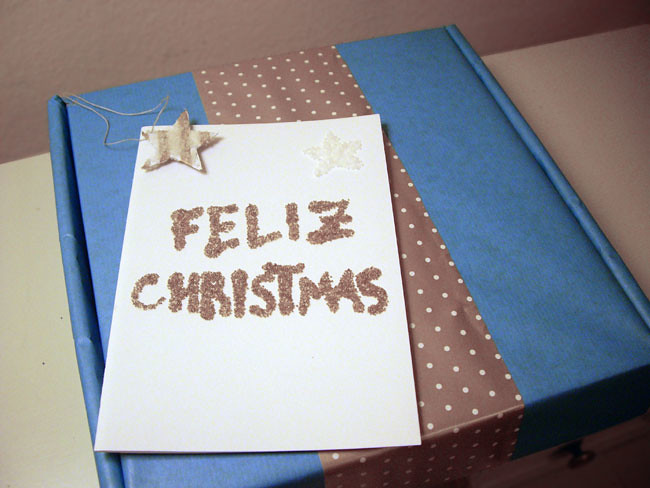
Una vez recopilados los materiales, no hay más que escribir con pegamento lo que queráis y dejar caer muchas bolitas o el azúcar sobre el pegamento e irán cogiendo la forma de lo que hayáis escrito o dibujado. Es mejor hacerlo poco a poco y con mucho cuidado para que quede mejor, mi tarjeta la hice muy rápida y creo que se notan un poco las consecuencias ;)
Once you have all the materials, you just need to write with glue what you want, make a lot of the little balls /sugar fall over the glue and they'll start getting stuck to your cardboard with the shape you wrote/drew. It's better to do it little by little and carefully so that it'll end up as precise as possible (not like mine ;)
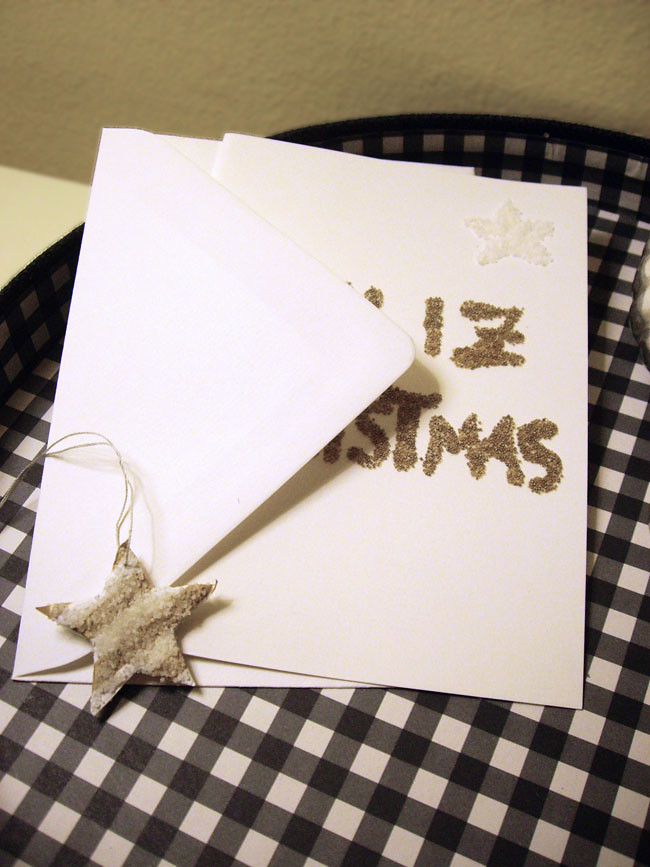
También funciona recortando estrellas o cualquier otra forma navideña recortada en cartulina, y haciéndole depués un agujerillo lo podemos colgar de un árbol de Navidad low-cost o como adorno para empapelar regalos. Si lo hacéis con azúcar, no pongáis demasiada y tened en cuenta que se transparenta, así que pintad las figuritas o empapeladas con el color que queráis que se note.
If also works if you cut stars or any other shape out of a piece of cardboard, and making a little hole afterwards, you can hang it from a low-cost Christmas tree or to decorate the presents you wrap. If you use sugar, don't put too much and take into account that it's transparent, so paint the little shapes or wrap them with the colour you want to be seen through.

¡Que tengáis un buen fin de semana!
Have a great weekend!
AIAM
················································································

a mi me encanta la idea, lo malo que yo soy tan chapuzas que se me da fatal, tenías que ver mis maquetas eso sí arte no faltaba ;) muaa
ReplyDeleteQue apañada eres :) esas bolitas son una monada, a ver si las encuentro por aquí!
ReplyDeleteQué bonita! Y sobre todo que cuando algo está hecho por uno mismo, tiene todavía más valor.
ReplyDelete